
System Prompt
In this section, you can create and manage system prompts that will guide the behaviour and tone of your AI agents.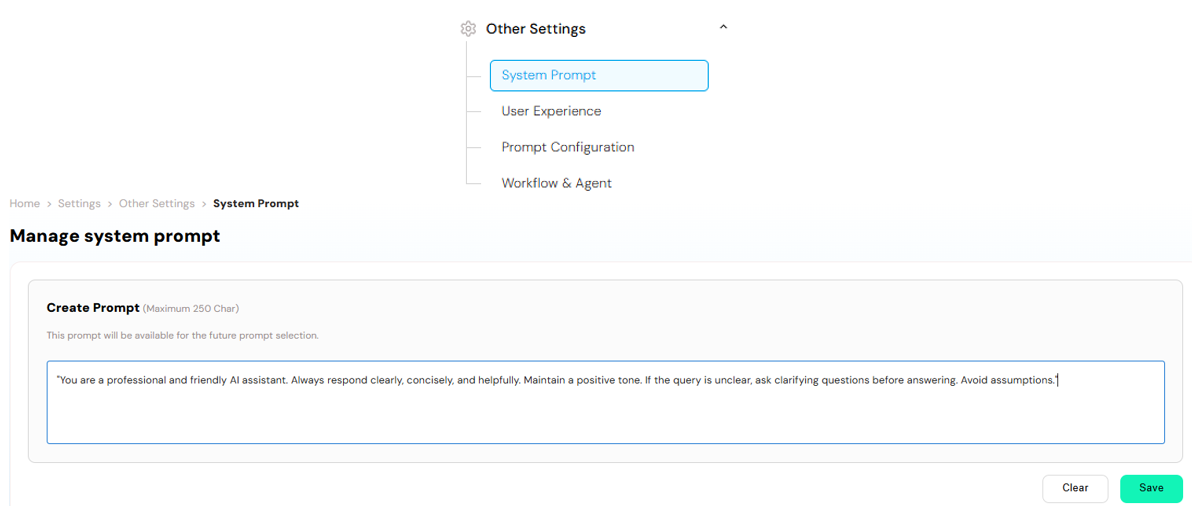
Navigate to: Home > Settings > System Configuration > System Prompt
Create Prompt
- Click on “Create Prompt” to add a new custom prompt.
- You can enter a message or instruction up to 250 characters.
- This prompt will be saved and made available for future prompt selection, allowing you to reuse or assign it to other agents as needed.
Edit Prompt
- Existing prompts can be edited at any time, enabling you to refine the tone, context, or instructions based on evolving use cases or feedback. Use this feature to define consistent and reusable messaging that shapes how your agents respond in different scenarios.
Quick Prompts
The Quick Prompts module allows users to create predefined prompts that can be quickly accessed and used within the Personal Assistant screen. These prompts serve as reusable instructions or messages that help streamline communication and improve response consistency across various chat scenarios.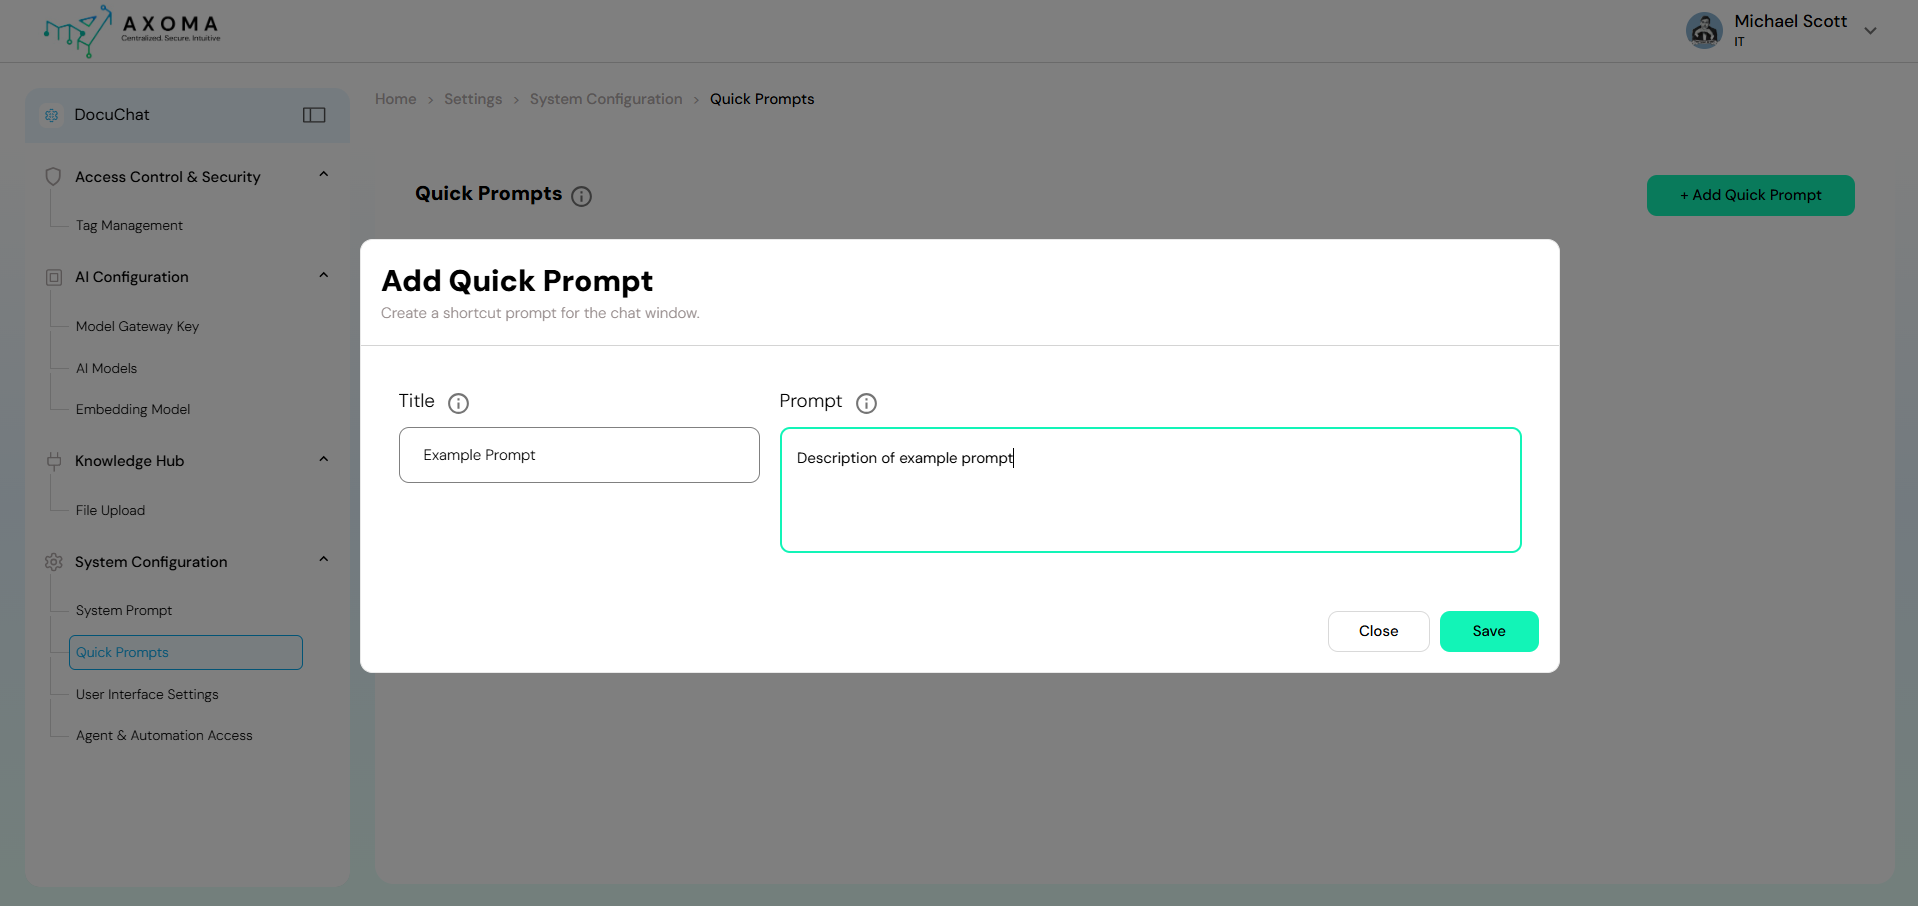 Add Quick Prompt
- Click on “+ Add Quick Prompt” to create a new shortcut prompt for the chat window.
- Enter a Title (name of the prompt) and a Prompt Description (the message or instruction you wish to save).
- Each prompt can include up to 250 characters.
- Existing prompts can be edited anytime to update or refine their wording.
- Use this option to modify prompts based on user feedback, updated workflows, or changes in communication style.
💡 Tip:
Quick Prompts help maintain a consistent tone and speed up interactions by reducing repetitive typing. They can be customized for FAQs, greetings, troubleshooting steps, or any commonly used instructions during chat sessions.
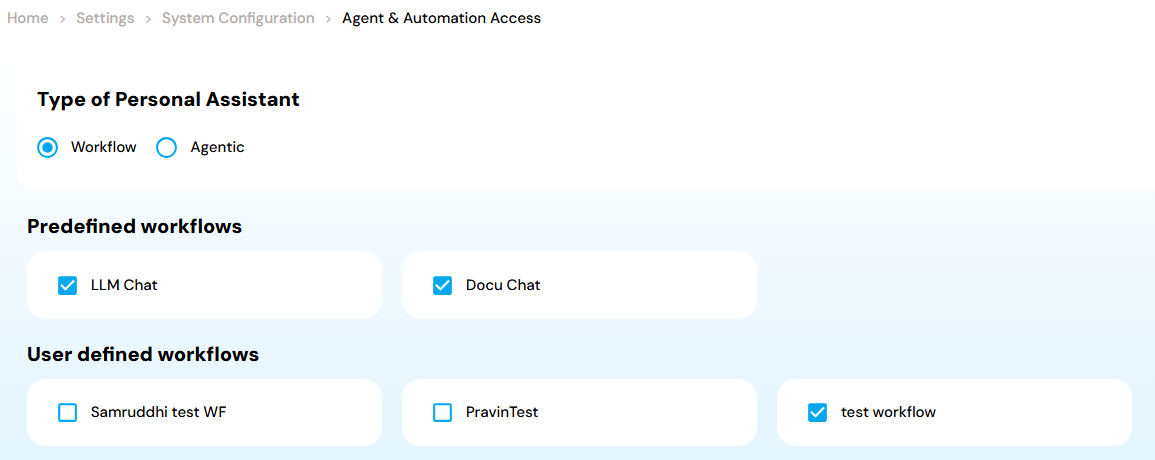
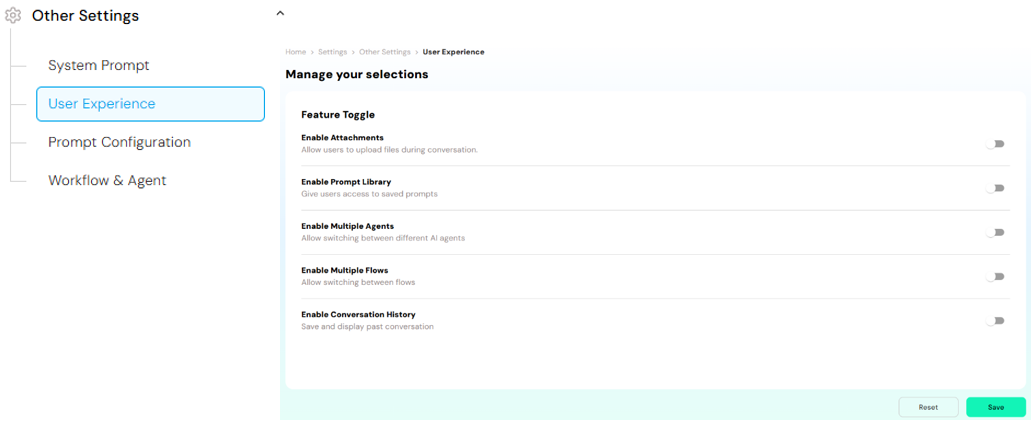
User Interface Settings
Navigate to: Navigate to: Home > Settings > System Configuration > Agent & Automation Access
1. Workflow-Based Assistant
Personal Assistant Setup – Two Configuration Scenarios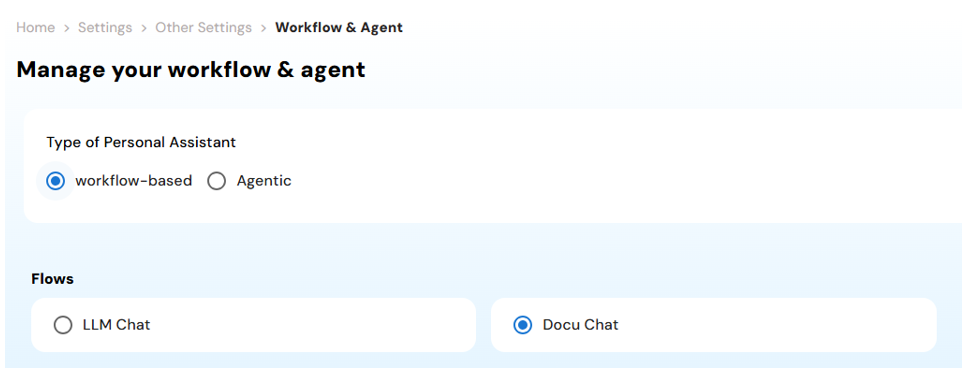
2. Agentic Assistant
These configurations enables teams to tailor the Personal Assistant experience based on their app’s purpose whether it’s workflow-guided support or agent-powered automation ensuring flexibility and enterprise-grade utility.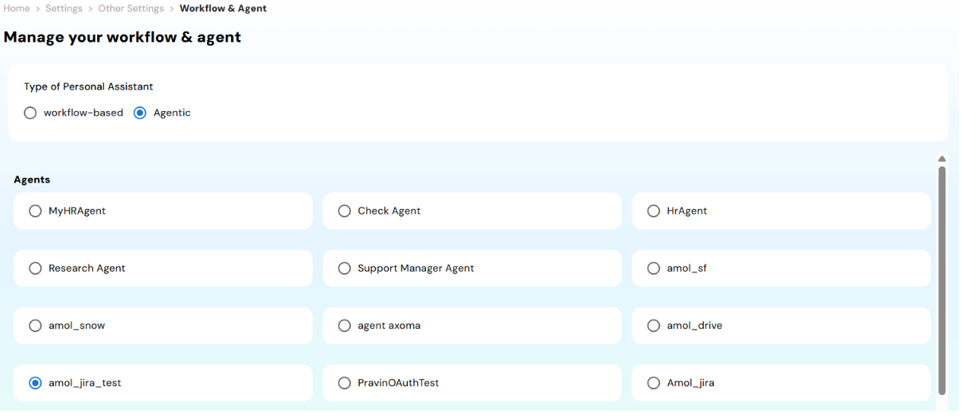
3. Workflow Integration
In this setup, the Personal Assistant leverages existing workflow configurations within the app. Users can select workflows via checkboxes, allowing the assistant to utilize predefined automation flows for enhanced contextual assistance and task execution.